atxserver2设备管理平台搭建
[TOC]
前言
前面分享了STF Andriod设备远程管理平台的搭建和使用,但是STF不支持iOS设备连接,虽然现在社区有了STF集成iOS设备的开源方案,但是经过实践不太稳定,后面再Testerhome社区发现了一个新的框架ATX2同时支持Android和iOS设备远程管理,经过实践设备连接非常稳定,所以这里分享下这个平台的搭建和使用
ATX2简介
ATX2是一款可以远程控制Android和iOS设备的设备管理平台。该平台使用的技术栈为:Python3+NodeJS+RethinkDB 项目目前已经开源,作者是阿里的一位大牛:codeskyblue
- 项目:Github地址:https://github.com/openatx/atxserver2
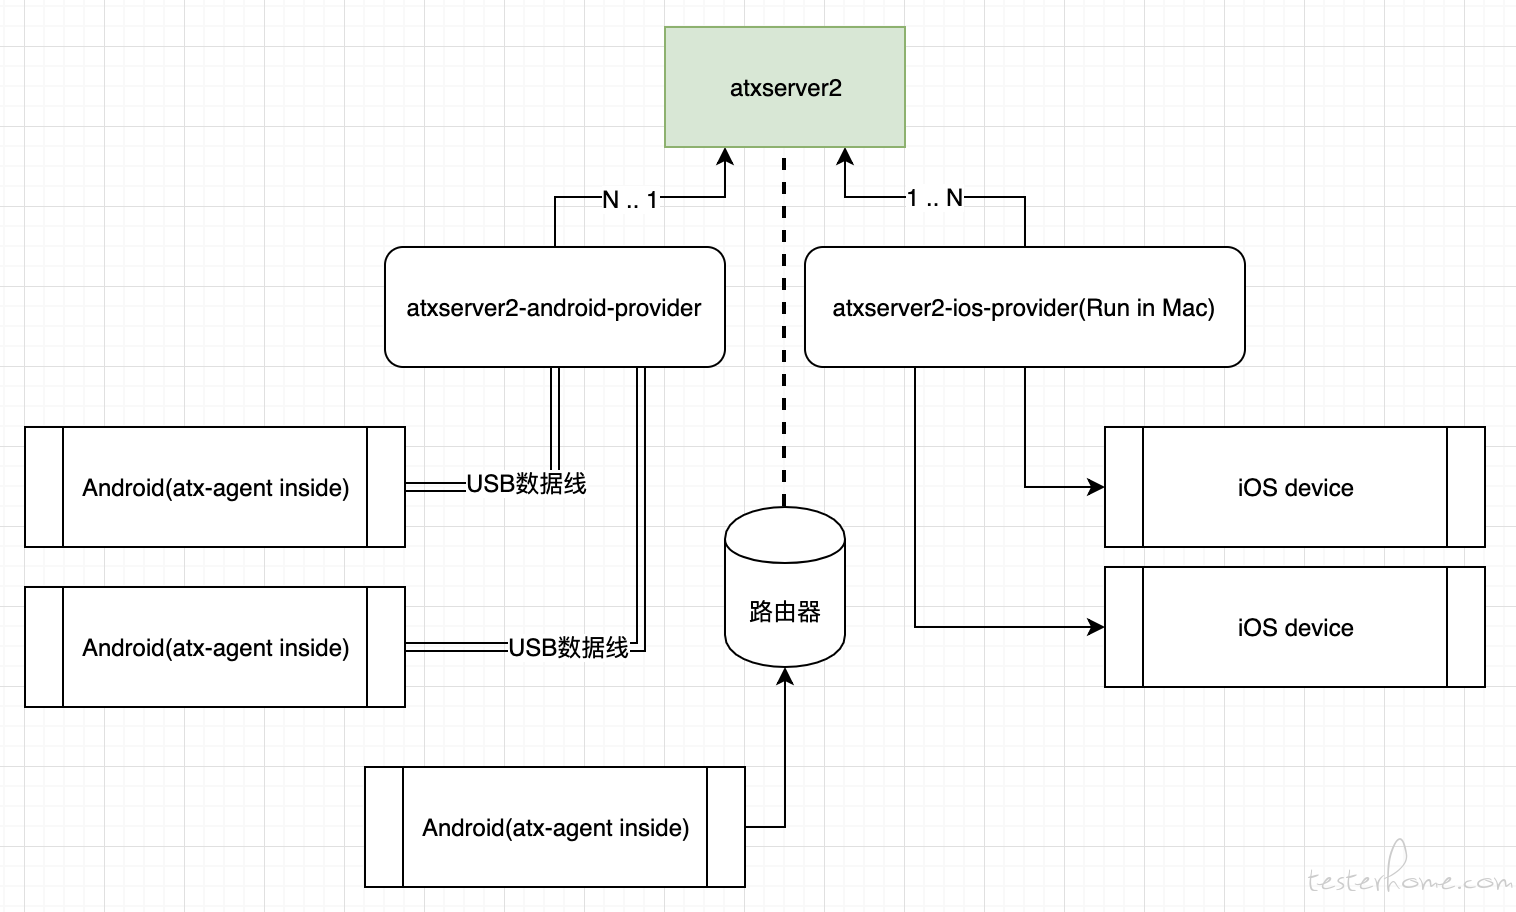
- 平台框架图如下所示:
环境准备
系统环境:Mac Os 10.14.6(因为要使用iOS设备连接WDA,所以需要Mac Os环境)
python3安装
1 | brew install python3 |
rethinkdb安装
1 | brew install rethinkdb |
服务部署
启动ATX2服务有2种方式:
- Docker部署
- 源码部署
Docker部署
- 使用Docker部署需要安装Docker,具体安装步骤见:Docker安装
- 代码Clone到本地
1 | git clone https://github.com/openatx/atxserver2 |
- 打开命令终端,切换到代码目录,执行一条命令即可
1 | docker-compose up |
源码部署
先准备好一个rethinkdb服务器,并启动
1 | rethinkdb |
代码clone到本地
1 | git clone git@github.com:openatx/atxserver2.git |
打开命令终端,切换到代码目录,然后执行命令下面的命令安装依赖
1 | pip3 install -r requirements.txt |
启动服务,命令如下
1 | #默认方式启动,使用默认的登录方式,默认端口 |
打开页面
启动之后,浏览器打开http://localhost(本机ip也可以):4000,登录之后就可以顺利的看到设备列表页了,由于还没有接入设备所以设备列表为空。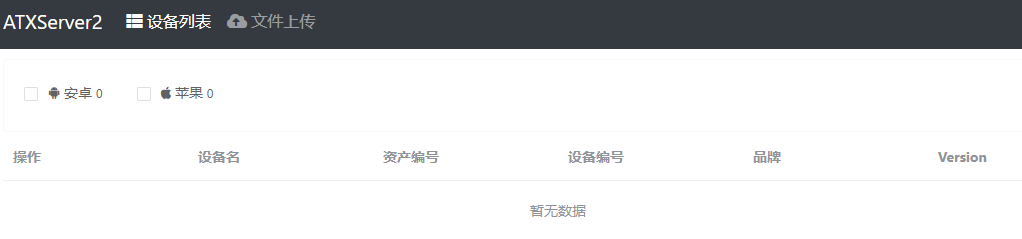
Android设备接入atxserver2-android-provider
依赖 Python3.6+, NodeJS 8, Git-LFS
NodeJS版本太高了也不行,一定要NodeJS 8,推荐使用nvm管理node版本
Install git-lfs
1 | brew install git-lfs |
Clone代码到本地,切换到代码目录
1 | git clone https://github.com/openatx/atxserver2-android-provider |
安装依赖
1 | npm install |
启动,需要指定atxserver2的地址, 假设地址为 http://localhost:4000
1 | python3 main.py --server localhost:4000 |
Provider可以通过adb track-devices自动发现已经接入的设备,当手机接入到电脑上时,会自动给手机安装minicap, minitouch, atx-agent, app-uiautomator-[test].apk, whatsinput-apk
接入的设备需要配置好开发者选项, 不同设备的设置方案放到了该项目的Issue中, tag: device-settings 如果没有该机型,可以自助添加
iOS设备接入atxserver2-ios-provider
依赖 Python3.6+, NodeJS 8, WebDriverAgent(appium)
安装libimobiledevice工具包
1 | brew uninstall --ignore-dependencies libimobiledevice |
安装atxserver2-ios-provider,
1 | git clone https://github.com/openatx/atxserver2-ios-provider --recursive |
初始化其中的ATX-WebDriverAgent
1 | git clone https://github.com/appium/WebDriverAgent |
后找台手机接到苹果电脑上。 按照这个文档https://testerhome.com/topics/7220 对WebDriverAgent项目进行下设置
启动
1 | python3 main.py |
连接成功后,如下图所示可以看到连接的iOS设备,点击立即使用即可远程控制。